12 Fashion DIY Projects To Give Your Old Clothes New Life
As the pitfalls of fast fashion become more apparent, finding new ways to get more out of your wardrobe is key. Beyond opting for quality pieces over fast fashion clothes, choosing versatile basics and buying second-hand are other ways to avoid fast fashion. Yet another option, and one that allows you to express your creativity, is upcycling your clothes.
Upcycling can keep your wardrobe eco-friendly since it helps prevent waste, which may be a bigger deal than some realize. According to earth.org, 92 million tons of textile waste is produced yearly, and the average American consumer tosses out about 81.5 pounds of textiles each year. Not only are these numbers staggeringly high, but they're expected to grow. Upcycling can be a great way to ensure that your old garments aren't landfill-bound.
Some may think of upcycling and recycling as the same thing, but they're pretty different. Recycling involves taking something old and breaking it down so it can be reused. Upcycling, on the other hand, means that you're taking something in its current state and turning it into something new. Besides helping the environment, upcycling can help refresh your clothing. Not only can you create new looks out of old pieces and breathe life into a tired wardrobe, but you can also learn crafting techniques and express your creativity. If you're in need of DIY ideas, here are some ways to start transforming your outfits.
Turn jeans into skirt
With the resurgence of the '00s mini skirt, turning your old jeans into a skirt is an on-trend DIY hack. That doesn't mean you have to stick to a mini-skirt, though; you can opt for a longer length or even use two pairs of jeans to make a skirt. While it will involve some sewing, it's still a pretty straightforward hack.
To get started, you'll need a few tools. Besides your jeans, you'll need a pair of scissors, a seam ripper, and matching thread. Next, decide how long you want your skirt to be. After choosing your length, cut the legs about two inches longer than your desired length. You'll then need to use your seam ripper to tear out the seams of both legs all the way up through the crotch of the pants.
Next, use your seam ripper to rip the seams of one of the pant legs you've cut off and lay it flat under the front crotch area of your jeans. You'll need to make sure your jeans lay flat, and there should be a triangular shape where the second layer appears underneath. Pin your fabric, then, trim the excess length off so that everything is the same length, and sew this piece in place. Repeat this process with your other pant leg for the back of your skirt to finish. You can leave your edges raw, or hem them for a more polished look.
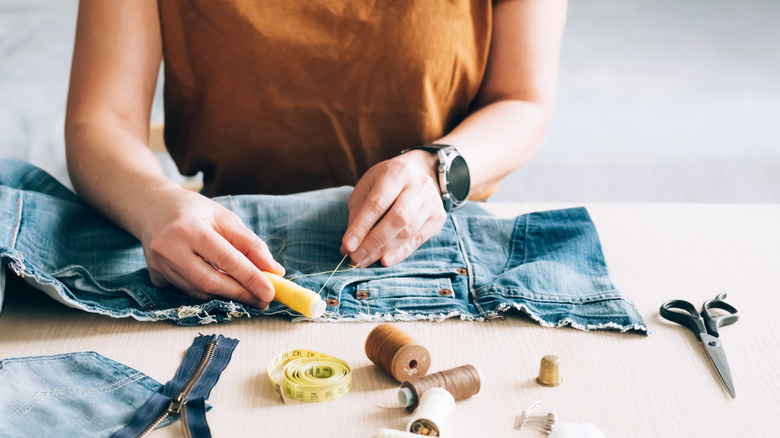
Turn jeans into distressed capris or shorts
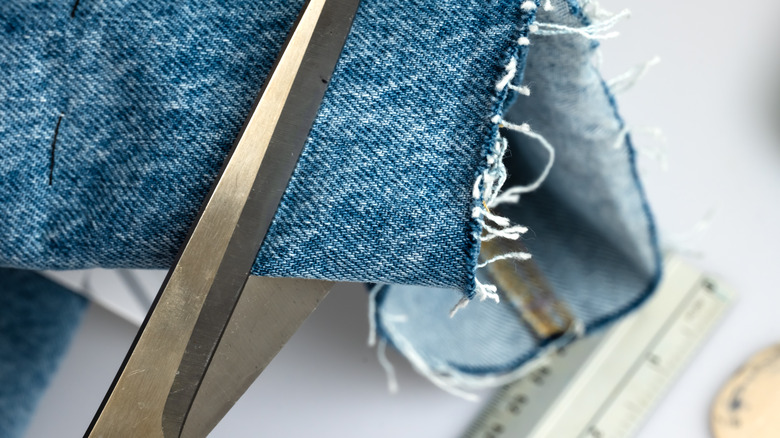
Turning old jeans into a pair of capris or shorts is another super simple DIY hack that can help you get more out of your old clothes. The first step is to take your jeans, lay them flat, and decide on the length you want. It's often best to be conservative about cutting at first since you can always cut more and shorten the length after the fact, but it will be harder to lengthen them if you cut them too short. After laying everything out flat, cut one leg and the other, ensuring they match the lengths at the inner seam.
Distressing your capris or shorts can be a fun and easy way to level up your look. To distress your denim, you'll need some tools. Along with a sewing pencil or tailor's chalk, you'll also need sandpaper, a cheese grater, tweezers, and scissors.
First, think about how you want it to look. Are you going for holes, or do you want your fabric to look more worn? Mark the areas you'd like to distress with your chalk or pencil before you begin cutting. After you've made your cuts, use sandpaper to rough up the edges of the opening. You can also use tweezers to pull on threads and exaggerate fraying. A cheese grater can create worn-looking spots, as can sandpaper. After finishing, wash your garment to help create more fraying.
Breathe new life into an old tee
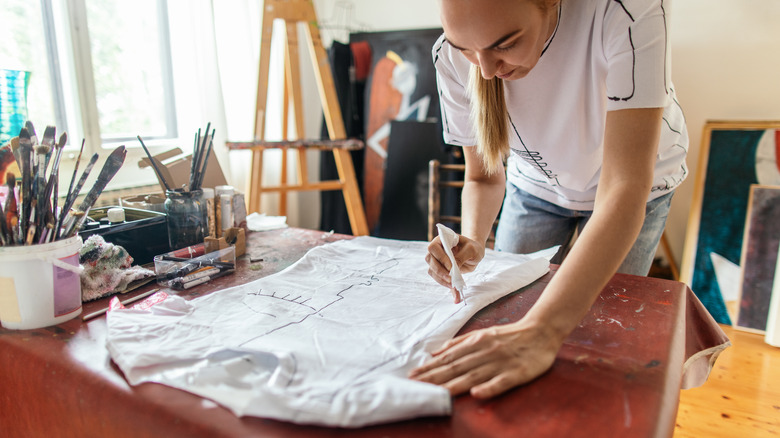
If you have some old tees you want to toss, you have lots of upcycling options. Depending on the size of your tees, they could become a new dress. If you have two oversized tees, transforming them into a comfy and on-trend summer dress with side cutouts is a simple, sewing-free DIY. The tools you'll need are scissors and a ruler. The first shirt will be the one you make the top half of the dress with. Cut off this shirt's neckline and sleeves, so it looks like a tank top. Then cut a small hole in the center of both the front and back of the tee.
With the second shirt, you'll make the bottom half. Take your second shirt and cut it across horizontally just under the armpits, discarding the part with the neckline and sleeves. After that, cut a two-inch slit down the middle of both the back and the front of the shirt. Take these pieces where you made the cut and then pull them through the hole you made in the front of the top half of the dress, tie a knot through it, and repeat for the back. If it doesn't feel sturdy enough, you can also sew these pieces together.
Go wild with dye
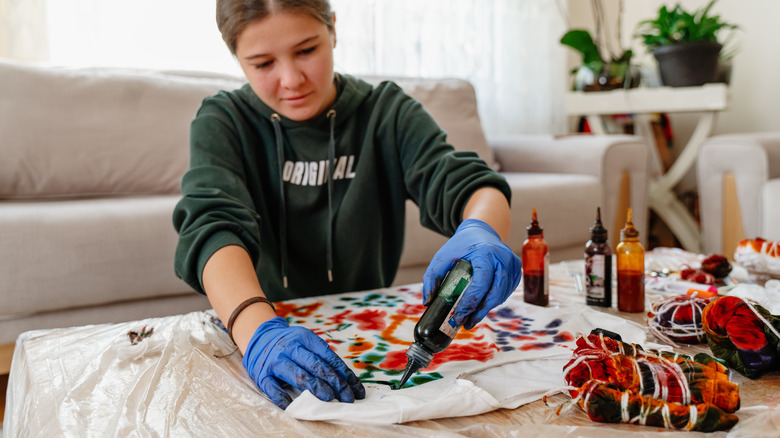
Whether you want to tie dye some old white tees or change the color of a garment, dyeing something old can be an effective way to liven up tired pieces, and add more color to your wardrobe. Tie-dyeing can be a lot of fun and can be used on many different clothes, though it will usually work best on white or light-colored pieces.
One of the easiest ways to tie-dye something is to buy a tie-dying kit. If you don't use a kit, you'll need a few items. Fiber-reactive dye is the best since cold water will help the dye bond to the fabric. Rubber bands, a plastic bag, and gloves are all also helpful when tie-dyeing, and working outside can help you avoid making a mess. If you're working indoors, laying down plastic before you get started is a must. Rubber bands will help you section off different areas for different colors, and squeeze bottles can help you achieve accurate application.
When dyeing to change the color of a garment, you'll need to check what type of fabric you're working with, as each material will have different requirements. In most cases, cotton will be the best at taking dye. Your dye can be purchased, or you can even make it at home with natural ingredients, such as beets or turmeric. A common way to dye garments is in the washing machine, by putting about four cups of water and your dye in the dispenser and running your washing machine on its hottest cycle.
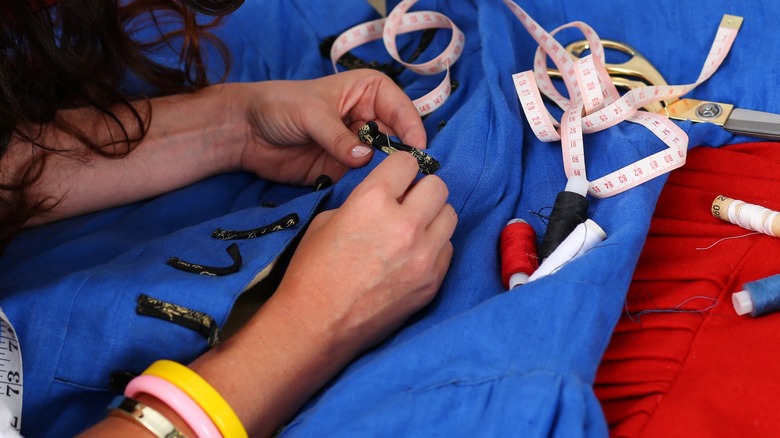
Sew on some patches
Patches aren't just for mending holes. Whether you sew or iron them on, patches can add personality to everything from shirts and jeans to purses and jackets. Besides embroidered iron-on patches, you can also use a variety of fabrics to patch your clothing. Denim on denim can be great, or if you want to mix things up, adding a leather elbow patch to your favorite knit sweater can be a fun way to mix fabrics.
To apply an iron-on patch, you'll first need to decide on placement. Then, spritz some water on the back and place it on your garment, embroidered side up. Lay some cotton fabric over your patch and then iron it on. Besides iron-on patches, there are many other ways to patch a garment. Many fabric stores carry patching fabric or you can have fun picking out patterned fabrics to create your favorite look.
Another way to upcycle old clothes, especially jeans, is to use them for patches. If you've tried other DIY projects like turning your jeans into shorts, capris, or a skirt, you can use the leftover scraps. When sewing patches, you need to ensure the patch is larger than the hole. One option to attach your patch is to place it over a hole and hand-sew it using a whip stitch. Something else you can try is a set-in patch, where the fabric is placed under the hole and can be sewn using a running or back stitch.
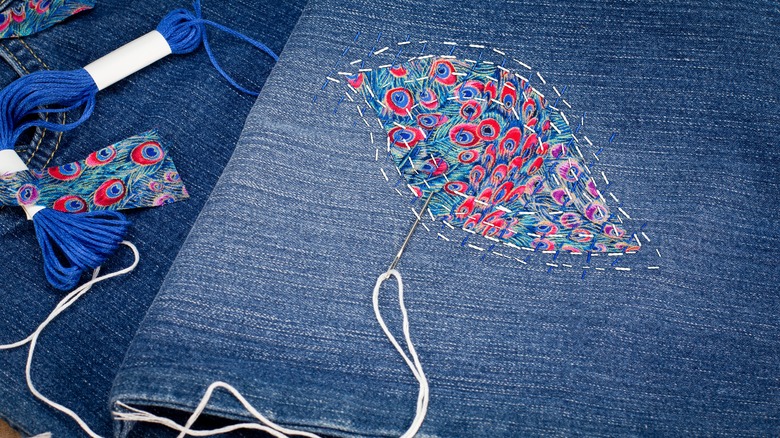
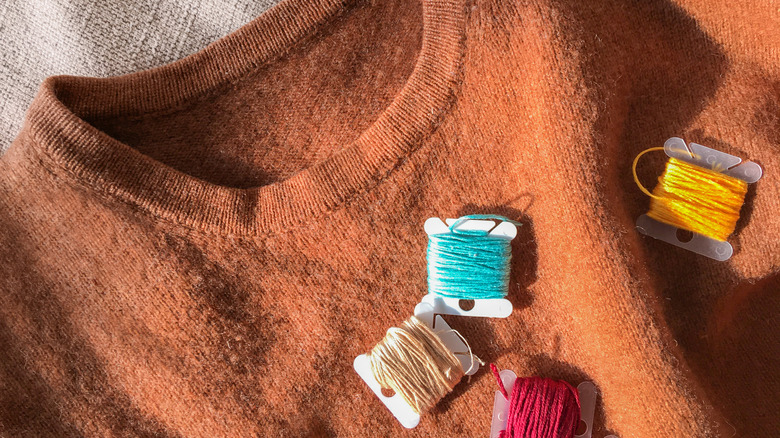
Try out embroidery
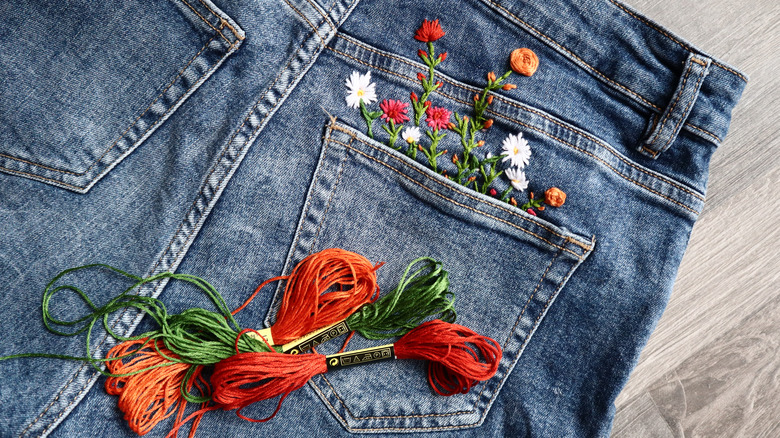
Embroidery may seem intimidating to some, but it can be an easy and fun way to add a personal touch to your clothing. Whether you want to stitch your name into your clothing or add cute touches like flowers and plants to your favorite pair of jeans, embroidery can give your clothing a unique look. It can also be a super relaxing way to express yourself. For larger projects, you may need more supplies, like an embroidery hoop and a stencil. For smaller projects, an embroidery needle, embroidery floss, and some scissors are usually enough. Many embroidery stencils can be found online and printed off, or you can draw your own designs on embroidery transfer paper.
A flexible rubber thimble is another helpful tool, especially if you're working with tough fabrics like denim or suede. Practicing on some plain cotton cloth before attempting to embroider your clothing can be helpful, and can be good practice. Running stitches and back stitches are two basic stitches that are useful for making straight lines, where the running stitch will have spaces between the visible thread, while backstitching creates a solid line. The satin stitch is a great stitch to learn for making shapes and filling in spaces like hearts or flowers.
Transform your old sweater
Just because your sweater looks old doesn't mean you should toss it. There are many ways to keep it in your wardrobe, albeit in a different form. You can turn it into a bolero, or a vest, or if you need some new cold-weather accessories, it can also become a pair of legwarmers or fingerless gloves.
One way to change up your old sweater is to cut off the sleeves and hem around the arm holes, making a vest. If you'd like to be trendy with a bolero, cutting out the front of your sweater and the lower half of the back while leaving the sleeves connected through the upper portion of the back can give you just that. Winter accessories are also easy to make with a sweater. If you need fingerless gloves, you can cut off the bottom portion of the sleeve and rip the seam to make a thumb hole. Old sweater sleeves can make great leg warmers, too. By cutting the sleeves from your sweater to your desired length, you can have some custom leg warmers and feel great about using something you might have thrown away otherwise.
When cutting knitted fabric, you'll need to make sure that the fabric doesn't unravel. Any portions that you cut will need to be sewn along the edge or will need to be hemmed. Adding piping is another option, which can also be a great way to add a contrasting color.
Make a new tote bag
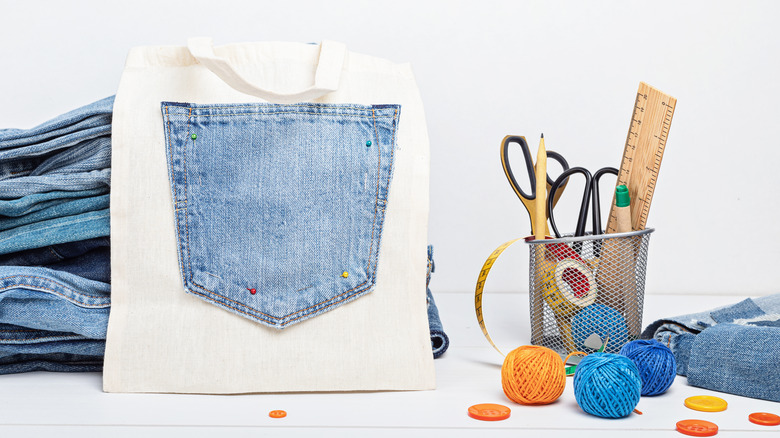
If you've got some old jeans, a jacket, a tee shirt, or something else made of sturdy fabric, you can turn it into a new market tote bag. What's great about making your own tote is that it's eco-friendly in several ways; Not only are you upcycling, but you're also creating something you can use to shop with instead of plastic bags — another plus for you and the environment.
If you're making a tote bag out of an old tee shirt, one way to do it is to cut off the sleeves and then cut a "U" shape down past the neckline of the shirt. You can then turn the shirt inside out and sew the bottom hem of the tee shirt together. If you don't want to sew, you can cut vertical strips along the bottom of the shirt and then tie them together, making a decorative fringe.
For a denim tote, you can use one or more pairs of jeans for a more interesting look. By cutting squares of denim, you can piece and stitch them together until you have a long rectangle. Face the outsides of the tote together, and sew along the sides, turning it inside out when done. Using long strips of denim for your tote handles can be a great option, or if you have an old belt you'd like to repurpose, using that for a strap is another way to make a quality tote.
Turn an old dress into a bodysuit

Transforming an old dress into a new bodysuit can be a great way to get more mileage out of a garment that you might not wear much. For this DIY project, you'll need a dress, preferably a bodycon or tight-fitting dress, a pair of underwear or swimsuit bottoms, scissors, a clothing pencil, no-sew snaps or velcro, and E6000 glue.
To start, turn your dress inside out and put it on. Use your clothing pencil to make marks one inch below your hipbones. Take the dress off and lay your swim bottoms or underwear on them, lining the top of the underwear up where the marks are on the dress. Use your pencil to trace the leg openings of your underwear, and when you get to the crotch, continue straight down to the bottom hem of your dress. You can try your dress on again to check the placement, then take the dress off and cut along the leg openings you traced.
The final step is to apply your Velcro or snaps, making sure you apply them to the inside on one piece of the crotch and the outside on the other. You can use glue to attach your snaps, and if you are using Velcro you can either use glue or sew the Velcro strips in. If you'd like, you can sew the raw edges of your bodysuit, or leave them as they are.
Craft cute hair accessories
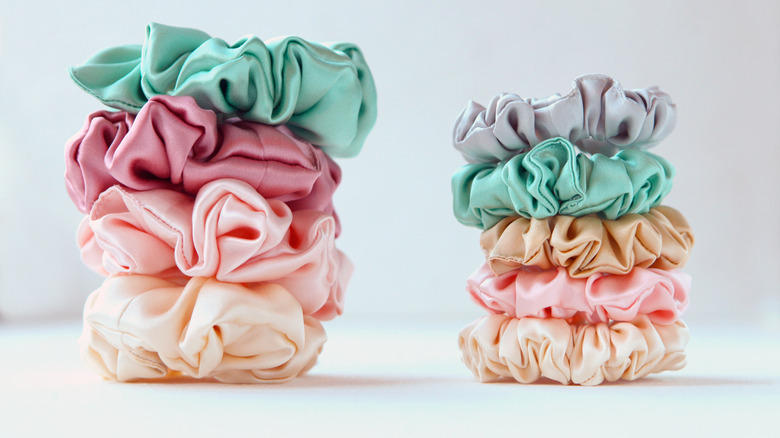
There are lots of cute hair accessories that you can craft from old clothes. Tee shirts especially can be great for being upcycled into hair accessories, and scrunchies are a particularly easy and cute option.
To make a scrunchie, you'll first need to cut a long piece of fabric, about 20 inches or so, and at least three and a half inches wide. You'll also need some elastic, a safety pin, and fabric glue. Once you have your long strip of fabric, fold it in half lengthwise with the outsides of the fabric facing each other. Sew together along the long edge, leaving the ends open, and then turn right side out.
Cut a piece of elastic to your desired length and attach it to the safety pin, using the pin to pull it through the tube of fabric that you sewed together. Once you have pulled it through, scrunch your fabric up and tie the ends of the elastic together. You can then use fabric glue to seal the open ends of the scrunchie around the elastic.
Have fun with lace, tassels, and other embellishments
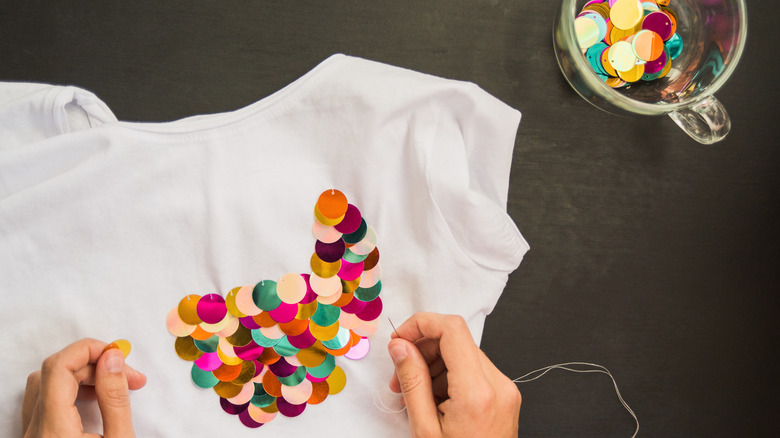
A few embellishments can be a simple way to add major style to clothes that are feeling stale. Things like lace, sequins, buttons, tassels, and studs can all introduce a lot of fun to your clothes and can be great for letting your creativity flow.
Adding some lace trim to your outfits can give them vintage appeal and can make them feel more delicate and romantic, too. Lace trim can be sewn around the neckline of a tee shirt or cami or along the bottom hem, and can also be a cute way to patch holes in jeans. Adding some tassels to an old canvas purse can give it some summery flair, as can sewing on some buttons or patches.
Stitching some beads or pearls to an old sweater can give it a youthful update, as can attaching some pompoms. Putting studs on an old belt, purse, or pair of jeans can create a new, punk edge. Your options are truly limitless with embellishments, and you can combine them to make eclectic and intriguing statement pieces.
Change your leggings into a new top
Transforming your old leggings into a cute new top is a viral hack that can help you reinvent your wardrobe. With some strategic cutting, worn-out leggings can become a crop top you can wear all summer, whether you pair it with a long, flowy skirt or your favorite pair of jorts.
To begin, you'll need to lay your leggings out flat on a smooth surface. Next, you'll need some seam rippers, or small pointed scissors, so you can rip out the seams of the crotch. Start at the center, and work down about four inches on either side. This is the area that will become your neck hole. After that, you can decide how long you would like your sleeves to be. For longer sleeves, you'll cut less fabric off of the leg portion of your leggings. For shorter sleeves, measure about seven inches down from your neck opening to cut. After that, your top is all done! You can try it on and adjust your sleeves as needed. If you want a more defined bra-top-type look, you can cut a strip of fabric left over from adjusting your sleeve length and use it to tie in the front chest area.