5 Subtle Winter Nail Art Designs To Inspire Your Next Mani
'Tis the season for unique nail art designs. In fact, it's human nature to adjust to cold weather by pulling out the browns, blacks, and reds of your nail polish collection. Nail designs are often used to symbolize an important event, holiday, or change in season. According to manicurist Christina Kao, while spring calls for long and bright nails, this winter calls for short nails. "Short nails have proven to be chic and low maintenance," she told Allure. "They offer a more natural look, which has been trending."
It's likely that you've been keeping up with nail trends that should be on your radar for winter, but knowing what to ask for at your next manicure isn't the same. While bright, bold glittery nails and lengthy jewel tipped acrylics are everywhere, they aren't for everyone. But if you still want your nails to have a seasonal vibe to them, don't worry, there are still plenty of subtle winter nail designs to choose from this year.
Red accents
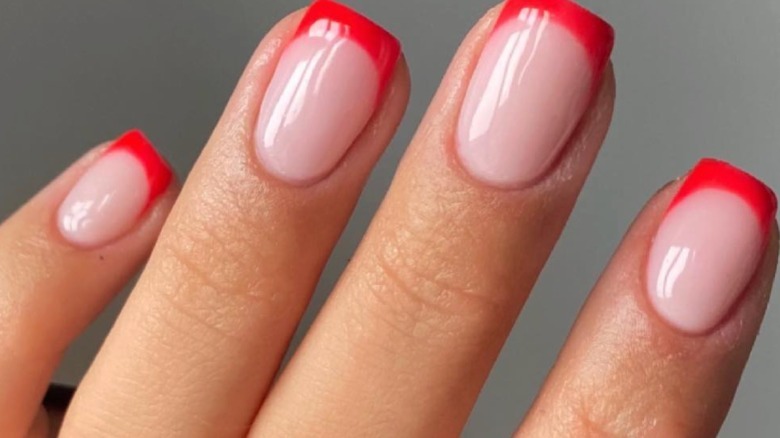
Red is a longtime winter favorite, but you don't have to go with full bright fire-engine colored nails. For a red nail look that's a bit more understated, yet chic, opt for a French tip manicure with almond-shaped edges in a red, deep scarlet or maroon color. Since the majority of the nail is a natural or clear color, it works as a great seasonal neutral to go with every outfit or accessory.
To get the look yourself, coat the entire nail with a clear polish before going in with the color. Using a thin brush, mark where your tips will end before filling in the top with your chosen color. Depending on precision, your French tip can be as thin or thick as you'd like. Once the first coat has dried, use a lighter red shade, such as scarlet, to trace a line (or more) over the coated portion. Make them curvy, straight, or squiggly — it's up to you.
Colorful glitter over black
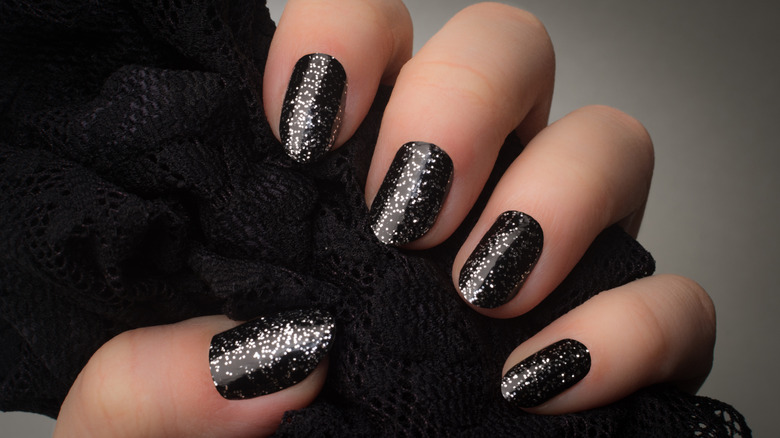
If you aren't afraid of some sparkle, but don't want to go full glitz and gold, opt for a black base with a light dusting of glitter. This perfectly encapsulates the festivity of the holidays without being too overtly Christmas or Thanksgiving themed. Start by applying two coats of matte black polish over each of your nails, since you'll want to make sure both colors stand out on your stand. Once the polish dries, apply one coat of a translucent glitter polish to compliment the black. Any shade of glitter will look flawless on this effortless winter nail design. You can finish off with a top coat or leave it as it is.
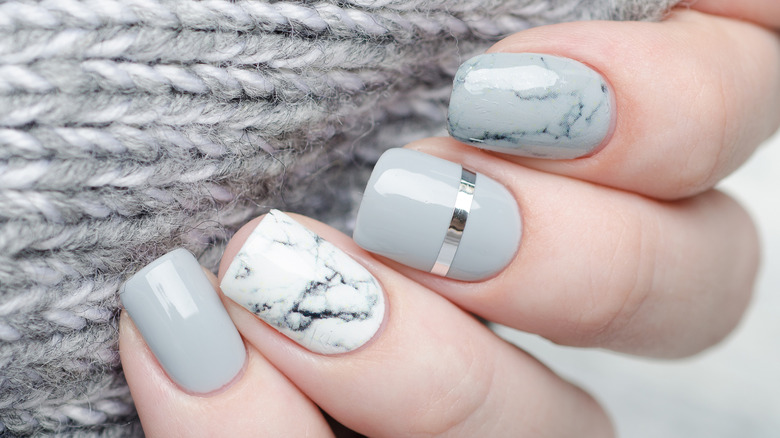
Matte gray
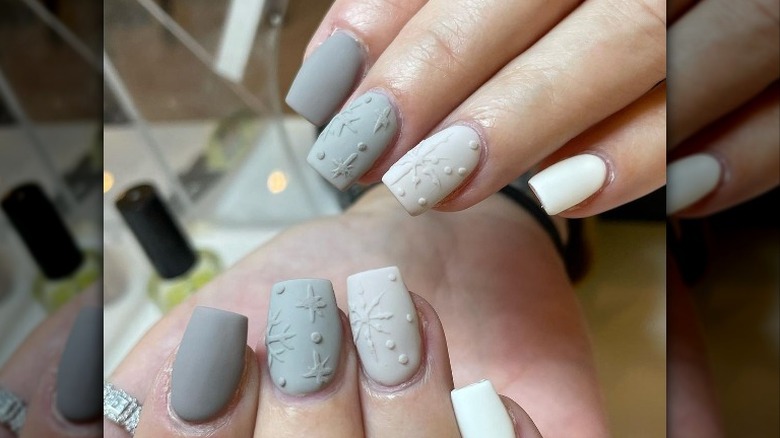
Gray has always been an underrated nail shade, but it's by far one of the best hues for a winter polish. For a look that isn't very loud, yet still in the spirit of the season, ask for varying shades of matte gray. The effect produced mimics the color of the chilly weather outside. If you want something more intricate, you can ask for textured designs like dots and snowflakes; though this may require some advanced technique.
Gold foil over red
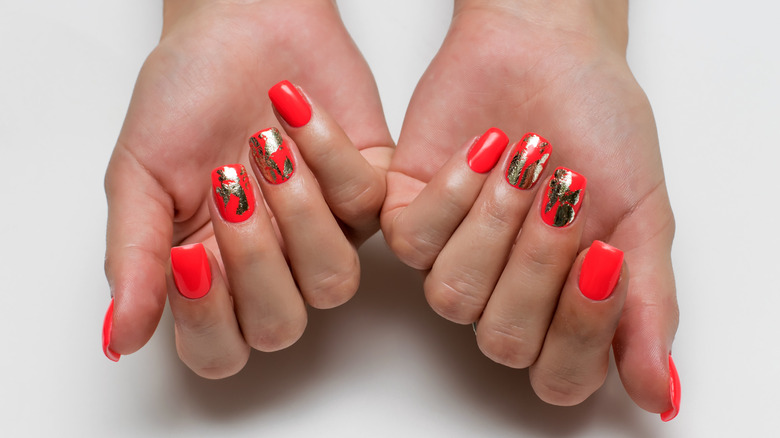
Speaking of complex yet achievable designs, gold foil is another accent you can't miss this winter. For the holiday season, red nails with gold foil are perfect for Christmas parties, New Years Eve celebrations. After applying the base coat of your choice, use a bright red or burgundy polish to coat each nail twice. Rather than waiting for the color to dry, use its tackiness to place gold foil pieces onto the nail. If you're worried about precision, use a tweezer to hold the foil in place until you're ready to place it down. Use the tweezer to lightly press down on each gold foil. Once each piece is in place and the polish has dried, use a top coat to secure the foil in place.
Sky blue with snowflakes
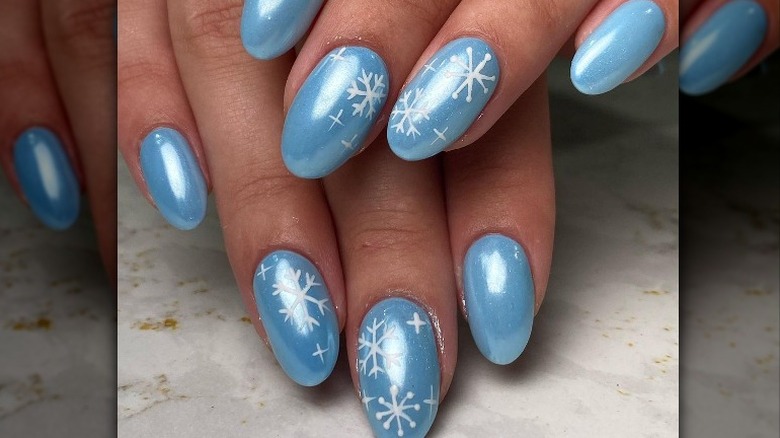
Last but certainly not least, it's not winter without snowflake nails. These can be achieved in a number of ways, from translucent tones to opaque blue. Apply a clear base coat to the nail before going in with the color of your choice. If you're someone who prefers opaque nails, use a light blue polish to coat the nails until they're dry. Once the polish is solid, use a dotting device to make six dots with one in the center of the nail. Using a toothpick, lengthen each dot into a line as they intersect with one another. Enhance the snowflake with two sets of stems on each line. Wait for the polish to dry and finish off with a top coat.
For translucent nails, apply two coats of a base coat and allow the nails to dry. Using a thin brush with blue or white polish, draw a small snowflake on the top of the nail (almost like a french tip). Once the design has dried, trace back these snowflakes with a glitter polish to help them stand out. If you're an expert nail artist, don't be afraid to draw multiple snowflakes onto the tip. We can't wait to see what nails you'll sport this winter season!