The Ins And Outs Of Press-On Nails For Beginners (Because Your Budget Deserves A Break)
When it comes to wearing gel or acrylic nails, we all know it can be a bit of a hassle. There's the time commitment, the financial commitment, and of course, the commitment to proper upkeep. Not to mention, gel and acrylic manicures can damage your nails over time. Should you love the look and feel of perfectly shaped and polished nails, but hate the idea of how much effort goes into them, you have probably contemplated wearing press-on nails.
But these nails, you might have found, come with their own set of problems. Press-on nails might not seem to fit right, stay on for as long as you want them to, or look natural. But press-on nails have come a long way in recent years, both in wearability and style. And if you're a newbie to press-on nails, there is a proper way to put them on that guarantees you will get the most out of them. Ensuring that you find the right size press-ons, adequately prepare them, and know the right application technique, is important to maintain their look and integrity. We've broken down the ins and outs of press-on nails for total beginners, so you can give your budget a break without sacrificing the put-together look of beautiful nails.
Prep makes press-ons perfect
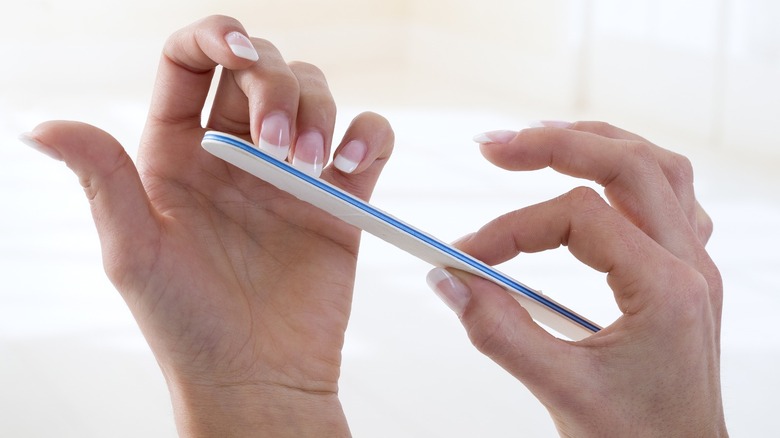
Properly preparing your press-on nails will make a world of a difference when it comes to application and longevity. The first step, however, is to choose the right press-on nails for you. Evaluate the shape and size of your nail bed. Are your nails more narrow or wide? Then, choose your press-ons accordingly. For those with narrow nail beds, slimmer press-on nails will ensure a proper, natural fit. These Petite French Almond press-ons from Static Nails can fit narrow nails, and those with wider nail beds can look into these wider-fit nails from KISS. But it is also essential to file down your nails, clean up your cuticles, and then file your press-on nails at the base to get a shape that matches your nail bed perfectly. This is the best way to make your press-ons look as natural as they can.
Once you are done filing, swab the top of your nails with alcohol to prep them for the glue. Lightly buff your nails to create a clean surface for the nail to adhere to. When you want your nails to last as long as possible, use quality nail glue to secure the nail. Dab a dot of glue on the base and tip of your natural nail, then press on the fake nails, holding them tightly against your finger for about a minute so they really stick.
How to gently remove the nails
Removal entails a few methods to consider. First, there is the acetone method. This is the method you want to use if you are totally done with your press-ons, as it can melt them off your nail. This method might be the quickest, but if you want to use your press-ons again, you have other options.
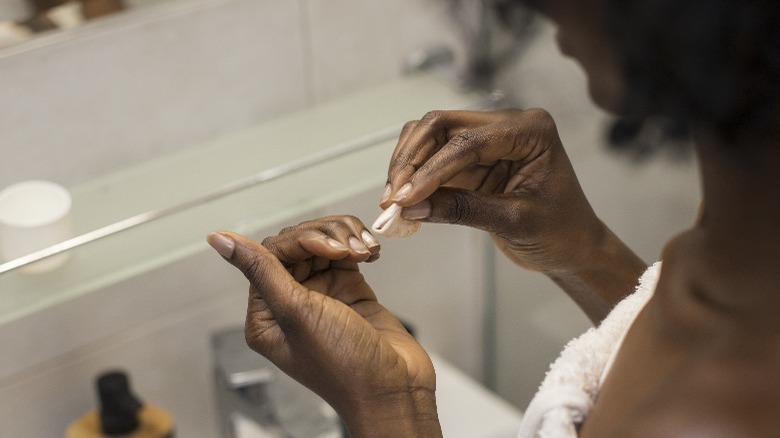
Soaking the nails in water and dish soap might be the most preferred method. Submerge your fingertips until you feel the press-ons begin to loosen. And you can also use cuticle oil to remove loosened nails. Put a few drops at the base of the nail and behind the nail, and let the oil saturate the area. Again, you will feel the nails begin to raise. When the press-ons feel ready to be removed, take your cuticle pusher, preferably made of wood or silicone so as not to damage the nail, and gently wedge it between the outer area of the press-ons and your nail, sliding it between them.
When the nails pop off — which could take a few minutes, as you do not want to rip them — you might notice some glue residue. Simply take your cuticle pusher and scrape it off, use a nail buffer, or go over your nail with some nail polish remover. Rub a dab of cuticle oil into your nails to help hydrate and nourish them, and you're ready for your next round of press-ons.