How To Prep Your Nails For Perfect Polish Application

If you've ever given yourself a manicure before, you'll know it can be tougher than it looks to get it right. Though doing your nails yourself at home can be more cost-effective and less time-consuming than a trip to the salon, it can sadly result in some mishaps. That's because at-home manicures are particularly prone to chipping, bubbling polish, and generally uneven results. A lot of the time though, it doesn't have anything to do with the polish we're using. Instead, it has more to do with the fact we're not prepping our nails properly before painting on a lacquer.
If you want smooth, even nails that are professional-looking and long-lasting, then it's important to remember that the application procedure starts a few steps before you put on any color. We're breaking down the perfect nail process (it's not that hard, so don't worry), to help you get salon-esque nails at home.
Start with clean nails
We've all been in a position where we don't remove our old polish properly before applying a new shade. But it's actually important to get rid of the old bits of polish before adding anything new — it's the only way you'll get a smooth, seamless application. The best way to remove old polish remnants depends on what kind of manicure you had. Regular polish is the easiest to take off, as standard nail polish remover on a cotton pad should do the trick (you could try an at-home nail polish remover in a pinch). For soft gel nails, you can usually remove those at home by gently buffing the gel with a nail file and then soaking your nails in acetone. The same goes for removing dip powders. For a hard gel manicure though, having it removed by a pro is much safer and healthier for your nails.
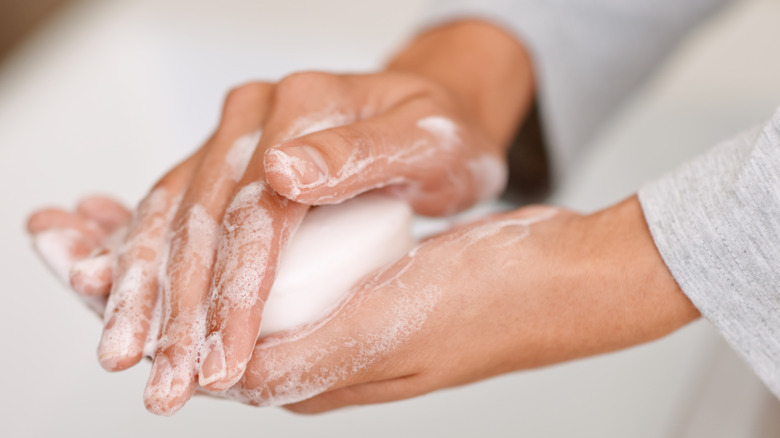
Once your old polish is gone, gently (and we mean gently!) push back your cuticles using a specific cuticle tool. This will give you more room to paint, and will help your manicure look more even. It will also help remove dead skin. After that, soak your hands in soapy water so you're working with a totally clean base. That gets rid of any dirt and helps remove oil buildup. As Butter London's global color ambassador Katie Jane Hughes told HuffPost, polishes don't adhere well to oily nails.
Cut, file, and buff your nails next
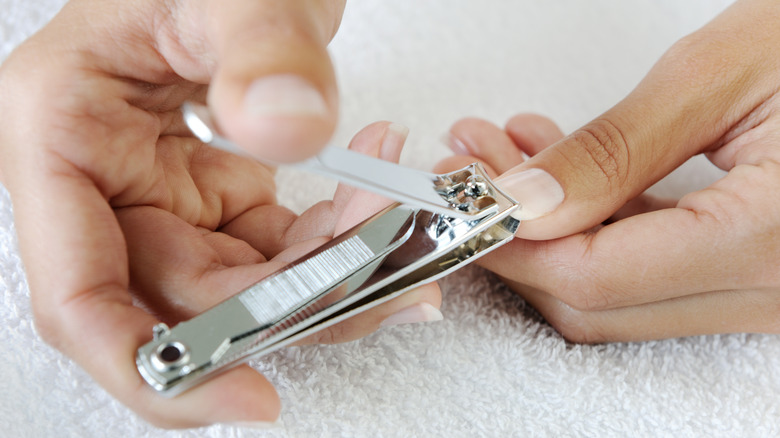
The next step to perfect nail prep is cutting your nails. You'll want to use specific nail scissors for this, as they'll allow you to get a more precise, sharper cut without damaging your claw. Some people prefer curved nail scissors, others prefer straight, and some people find nail clippers easier. It may take some trial and error to find what's best for you, but once you do, it makes the cutting process a whole lot easier.
After that, give your nail ends a file to get rid of any sharp edges. To prevent things like splitting and peeling, Healthline recommends only filing your nails in one direction. Moving your file back and forth can end up weakening the nail.
Even though your nails should already be free of old polish, manicurist Mariana Augusto shared with Byrdie that swiping some nail polish remover on a cotton pad over the top can dehydrate the nails and better prepare them for some color. Getting rid of any excess moisture will help prevent things like bubbles from forming in your polish, and will also keep chips at bay longer. This is also a good time to buff the surface of your nails. As Rita Remark, global lead educator for Essie, told HuffPost, buffing your nails can stop a build-up of natural oils that can ruin your manicure. It can also help to even out ridges, which could ruin the look of your polish.
Apply a base coat for perfect polish

The final step before applying your nail polish is a base coat. Base coats have plenty of benefits and will help your manicure's look and staying power. As Greg Salo, co-founder of Caption Polish, told HuffPost, a good base coat can help to fill in any ridges on your nails and can also help to strengthen them. Not only that, but base coats can also help your polish adhere to your talons better. That's particularly ideal for those who have things like nail ridges or peeling nails, which can be prone to chipping.
But that's not all. Another big plus that comes with a base coat is the way it can stop your nails from staining. Anyone who's a fan of a darker polish or things like reds or oranges will know how they can stain the nails. But applying another layer of product in between the polish and the nail should help keep stains to a minimum, improving the look of future manis.
For standard polishes, you're now free to start layering on your lacquer. If you're doing a gel manicure, you must use a specific gel base and cure it using your gel manicure equipment before applying your colors. Just make sure you read the instructions properly so you know how long you need to cure for and what the next steps are, as this can differ between different gel polishes.